Pipeline Builder
Overview
Pipelines let you chain dbt™ commands and shell commands into a single, ordered job — instead of running them one at a time. You build a pipeline visually, as connected nodes on a canvas, and Rosetta DBT Studio saves it as a YAML file.
Pipelines are stored in your project's .rosetta/ folder.
Creating a Pipeline
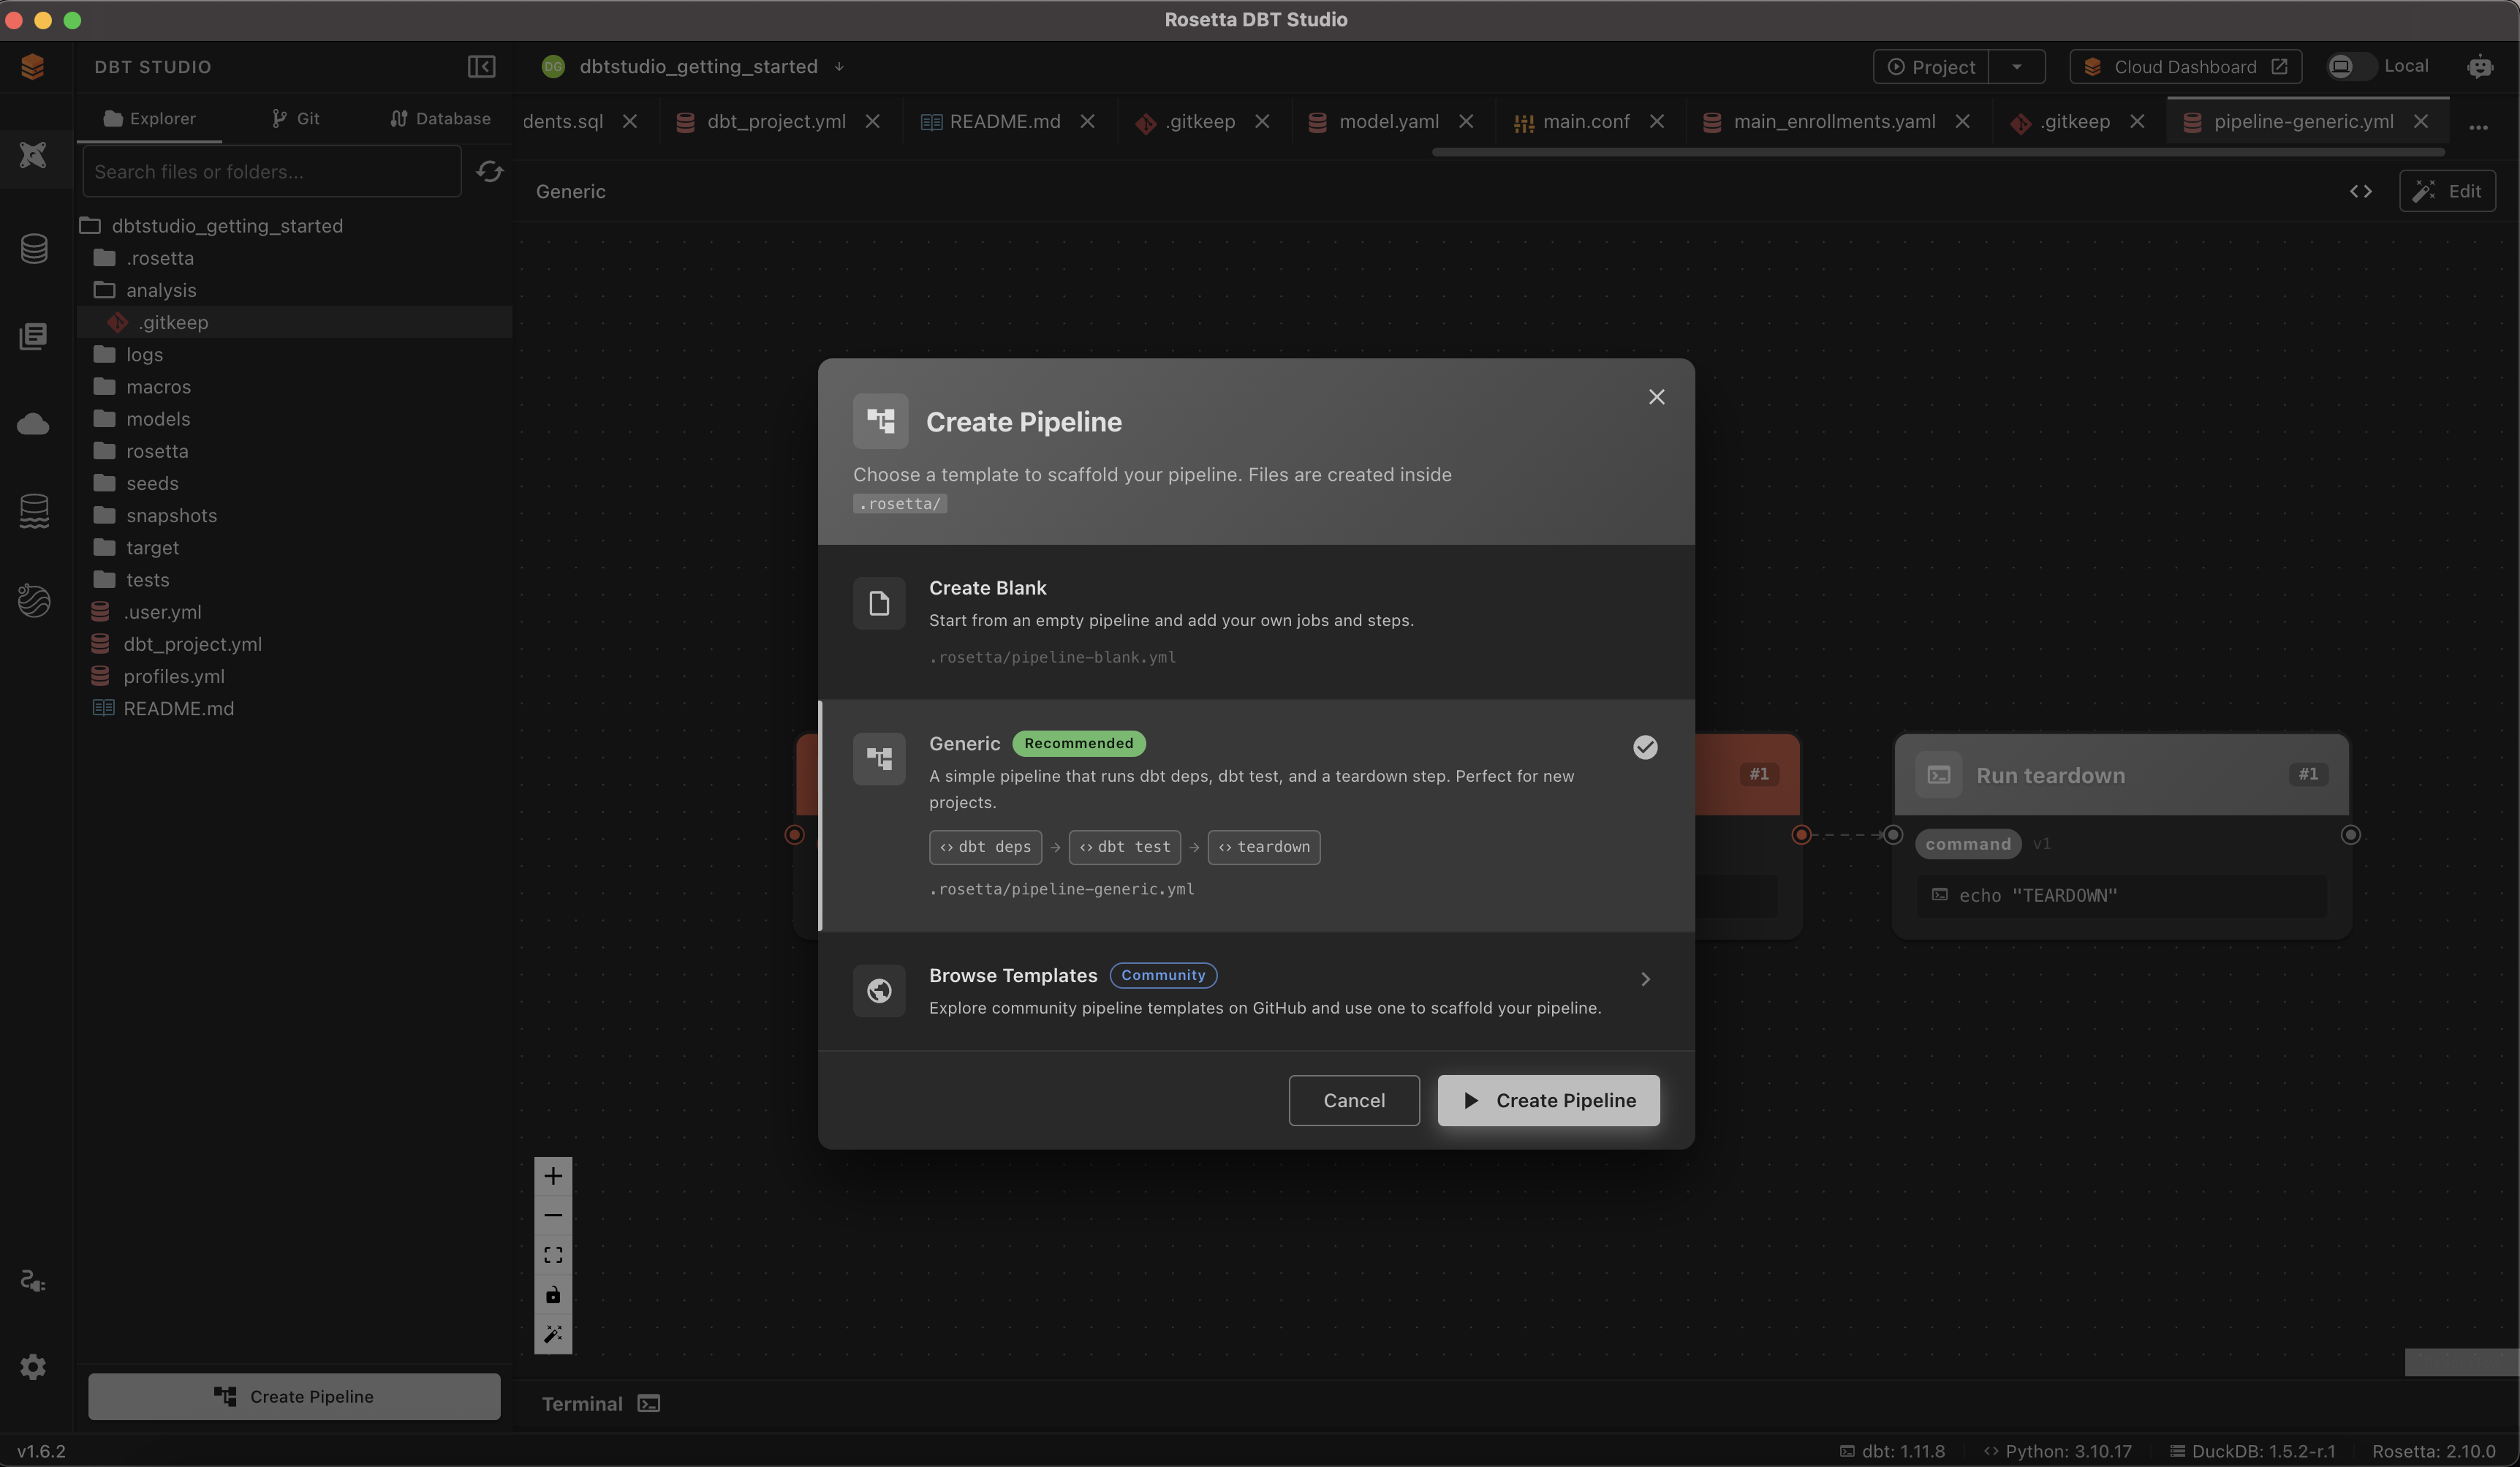
- In the file explorer, click Create Pipeline
- Choose a starting point:
- Create Blank — an empty pipeline you build from scratch
- Generic — a ready-made pipeline: install dependencies, run tests, then a teardown step
- Browse Templates — community-contributed templates from GitHub
- Click Create Pipeline
The pipeline opens on its own canvas.
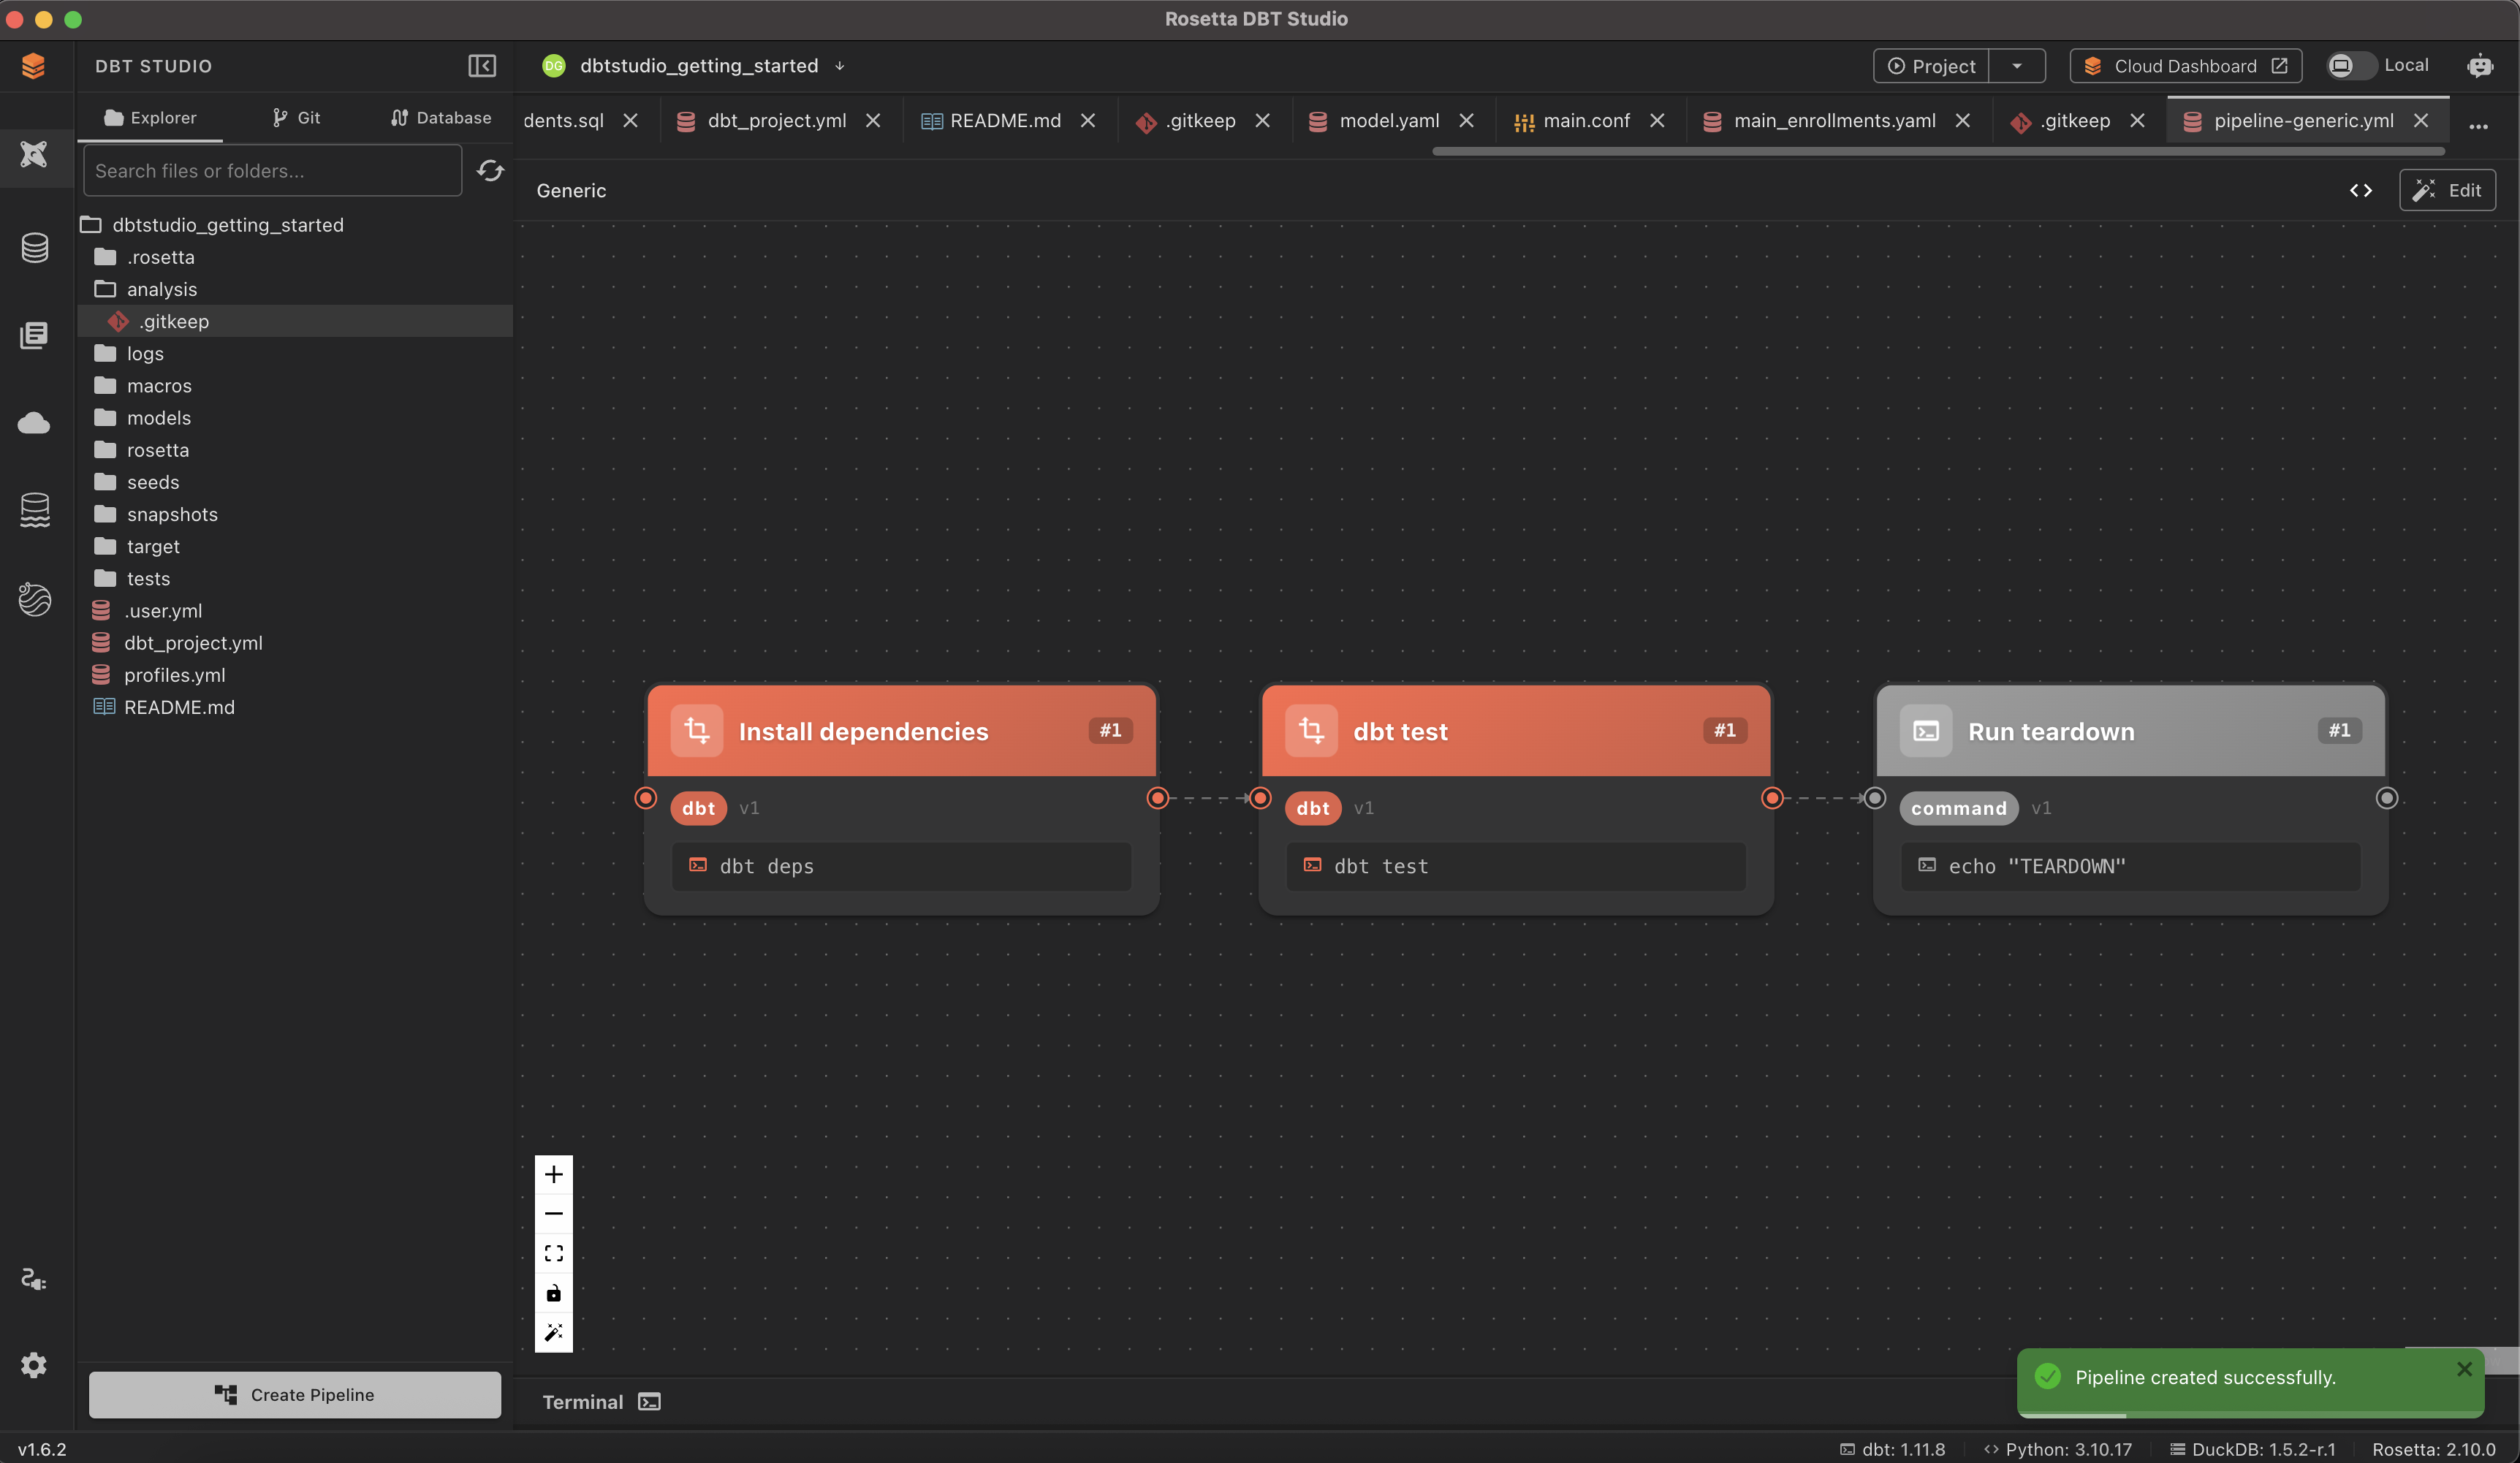
The Pipeline Canvas
Each node on the canvas is one step in the pipeline — a dbt command or a shell command. Nodes are connected left to right in the order they run.
- Edit — modify the pipeline
<>(code view) — toggle between the visual canvas and the underlying YAML- Canvas controls (bottom left) — zoom in/out, fit to screen, lock the canvas, and auto-layout
Tip: The code view is useful if you want to edit the YAML directly, or see exactly what a node will run.
Video
For a walkthrough of building and visualizing a pipeline, see the official video: Pipeline Visualization | Rosetta DBT Studio
Common Issues
A pipeline step fails → Check the command inside that node — the same troubleshooting as running it directly. See dbt™ Commands for what each command does.
Can't find my pipeline file
→ Pipelines are saved in the .rosetta/ folder in your project.